04 May Belly Casting
by Rachel Voigt, TCM student
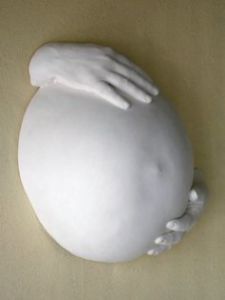
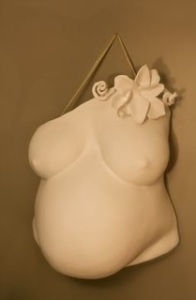
Belly casting can be a fun way to memorialize & remember the end of pregnancy & the beautiful belly that has housed your baby. Making the cast can be a family activity, a part of a blessingway or can be done by the parents of the baby. It can be done at any time in pregnancy; it is often done between 32-38 weeks. Some women choose to make a cast for each trimester as a way to remember the changes that happen over the course of a pregnancy.
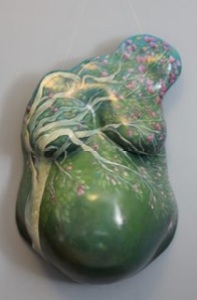
Belly casts can be used as decorative pieces in just about any space. Some women turn them into mobiles or central art pieces in their nurseries. They can also be used as decorative bowls if they are solely the belly. Families have also used them in newborn photo sessions as a fun way to see how baby may have been hanging out on the inside.
To make a belly cast you can choose to purchase a belly casting kit or you can gather the supplies on your own.
Kits:
Pearhead Belly Casting Kit $19.99 at Target
The Belly Casting Kit $12.97 from Motherhood Maternity
ProudBody Basic Pregnancy Belly Cast Kit $19.99 from Toys R Us (online or free in store pick up)
ProudBody Deluxe Pregnancy Belly Cast Kit $29.99 from Toys R Us (online or free in store pick up)
Casting Keepsakes Essential Pregnant Belly Mask Casting Kit $15.95 from Casting Keepsakes
Even if you do purchase a kit, you may still need to assemble some supplies from the following list. If you did not purchase a kit you will definitely need plaster bandages. These can be purchased from craft stores & some department stores (Target, Walmart, etc.).
Supplies:
- Drop cloth or old sheet
- Table that you don’t mind getting plaster on
- Petroleum jelly or Vaseline
- Bowl of warm water
- Belly Cast kit OR plaster bandages cut in lengths of up to 12 inches & in varying widths
- Paint or other materials to decorate the finished product with
- Optional: Clear Plastic Wrap (for covering your bra if you choose to use one)
- Instructions (if your kit does not come with instructions there are some below)
Instructions:
- Lay the drop cloth on the floor where you are planning to make the cast
- Place your chair in the middle of the drop cloth
- Mark the edges of the areas in which you want the cast to end (having jagged edges sticking out beyond the borders you were hoping for can be hard to remove after its tried). You can mark the area with a marker, pen or just discuss it with whoever is helping you to make the cast
- Put Vaseline or petroleum jelly over your belly & any others areas you’ll be including in the cast (breasts, arms, etc) *If you choose to wear a bra & include your breasts in the cast place plastic wrap over the bra in place of Vaseline)
- Have your casting assistant wet the plaster bandages in warm water & then smooth them evenly over your torso. Make sure your assistant is overlapping the strips & there are no open spaces. Plaster begins to dry within a few minutes of getting wet so you’ll need to move quickly but be careful to smooth the strips out nicely.
- Reinforce the cast by doing several layers of bandages.
- Allow the cast to dry for about 10 minutes on your body & then remove it carefully & slowly
- Place the cast in a secure area and allow it to dry for at least 24 hours.
- Trim edges as needed (this can be difficult so if you do this use sharp scissors & be careful!). Some women also like to sand the edges & the corners of their cast.
- Optional: Prior to decorating your cast you can mix up some plaster of paris & with either your hands or paintbrush go over the cast to smooth out any bumps
- Decorate however you’d like! Paint, stickers, tiles, feathers, collage style pictures…Anything that you would like.
- Keep in mind when decorating some women have found it useful to shellack the finished product with some sort of clear finishing spray or paint. You can find these sorts of things at most craft stores & department stores.


Sorry, the comment form is closed at this time.